IDEM
IDEM Heavy duty safety rope pull switch (left hand) GLHL & (right hand) GLHR
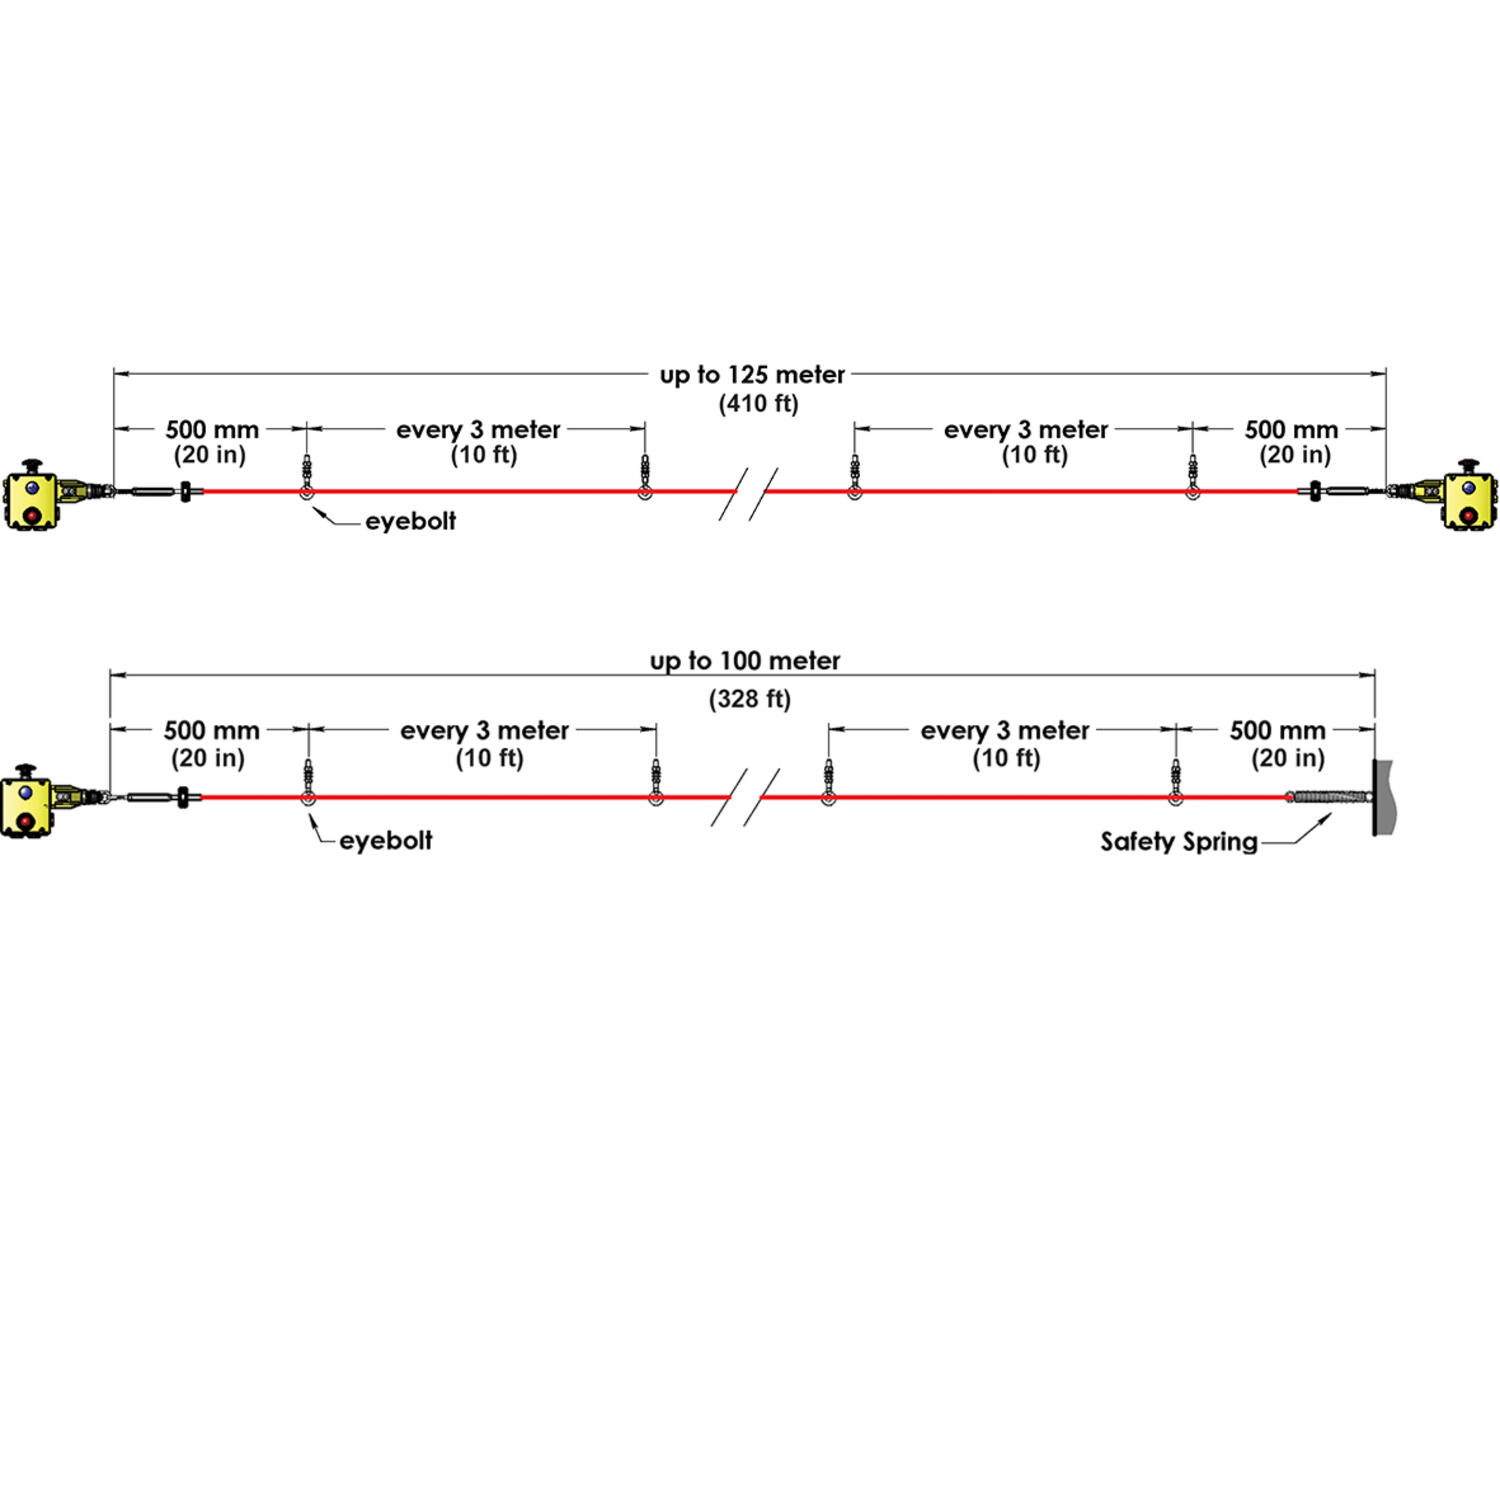
The GLHL/R is a robust die-cast Heavy Duty Safety Rope Pull Switch designed to protect long conveyor lengths where protection is required up to 125m using two switches or up to 100m using a single switch. The die-cast housings are robust to survive indoor or outdoor use.
A bi-colour LED ensures switch status can be seen easily from a distance. They have 4NC 2NO contacts to ensure flexibility with all modern control applications and optional Explosion Proof contact blocks are available.
They can be used to complement the GLHD versions at each end of the rope span.
- Can be used up to 100m in length using just one switch
- 4NC 2NO contacts to ensure flexibility
- Duel colour LED
- ATEX version available


Selected variant


Selected variant
Specifications
| Annual usage | 8 cycles per hour/24 hours per day/365 days |
|---|---|
| Approvals | EN60947-5-5, ISO 13850, ISO 13849-1, EN62061, EN60947-5-1, UL 508, CE, cULus, TÜV |
| Conduit entry | 4 x M20 |
| Contact Type | EN60947-5-1 double break type Zb, snap action up to 4NC (positive break) 2NO (auxiliary) |
| Contacts | 4NC 2NO |
| Fittings | E-stop and LED |
| Integrated emergency stop button | Yes |
| Integrated LED indication | Yes |
| IP Class | IP67 |
| LED Display | Steady green/Flashing red |
| LED supply voltage | 24Vdc |
| Mechanical reliability B10d | 1.5 x 10⁶ operations at 100mA load |
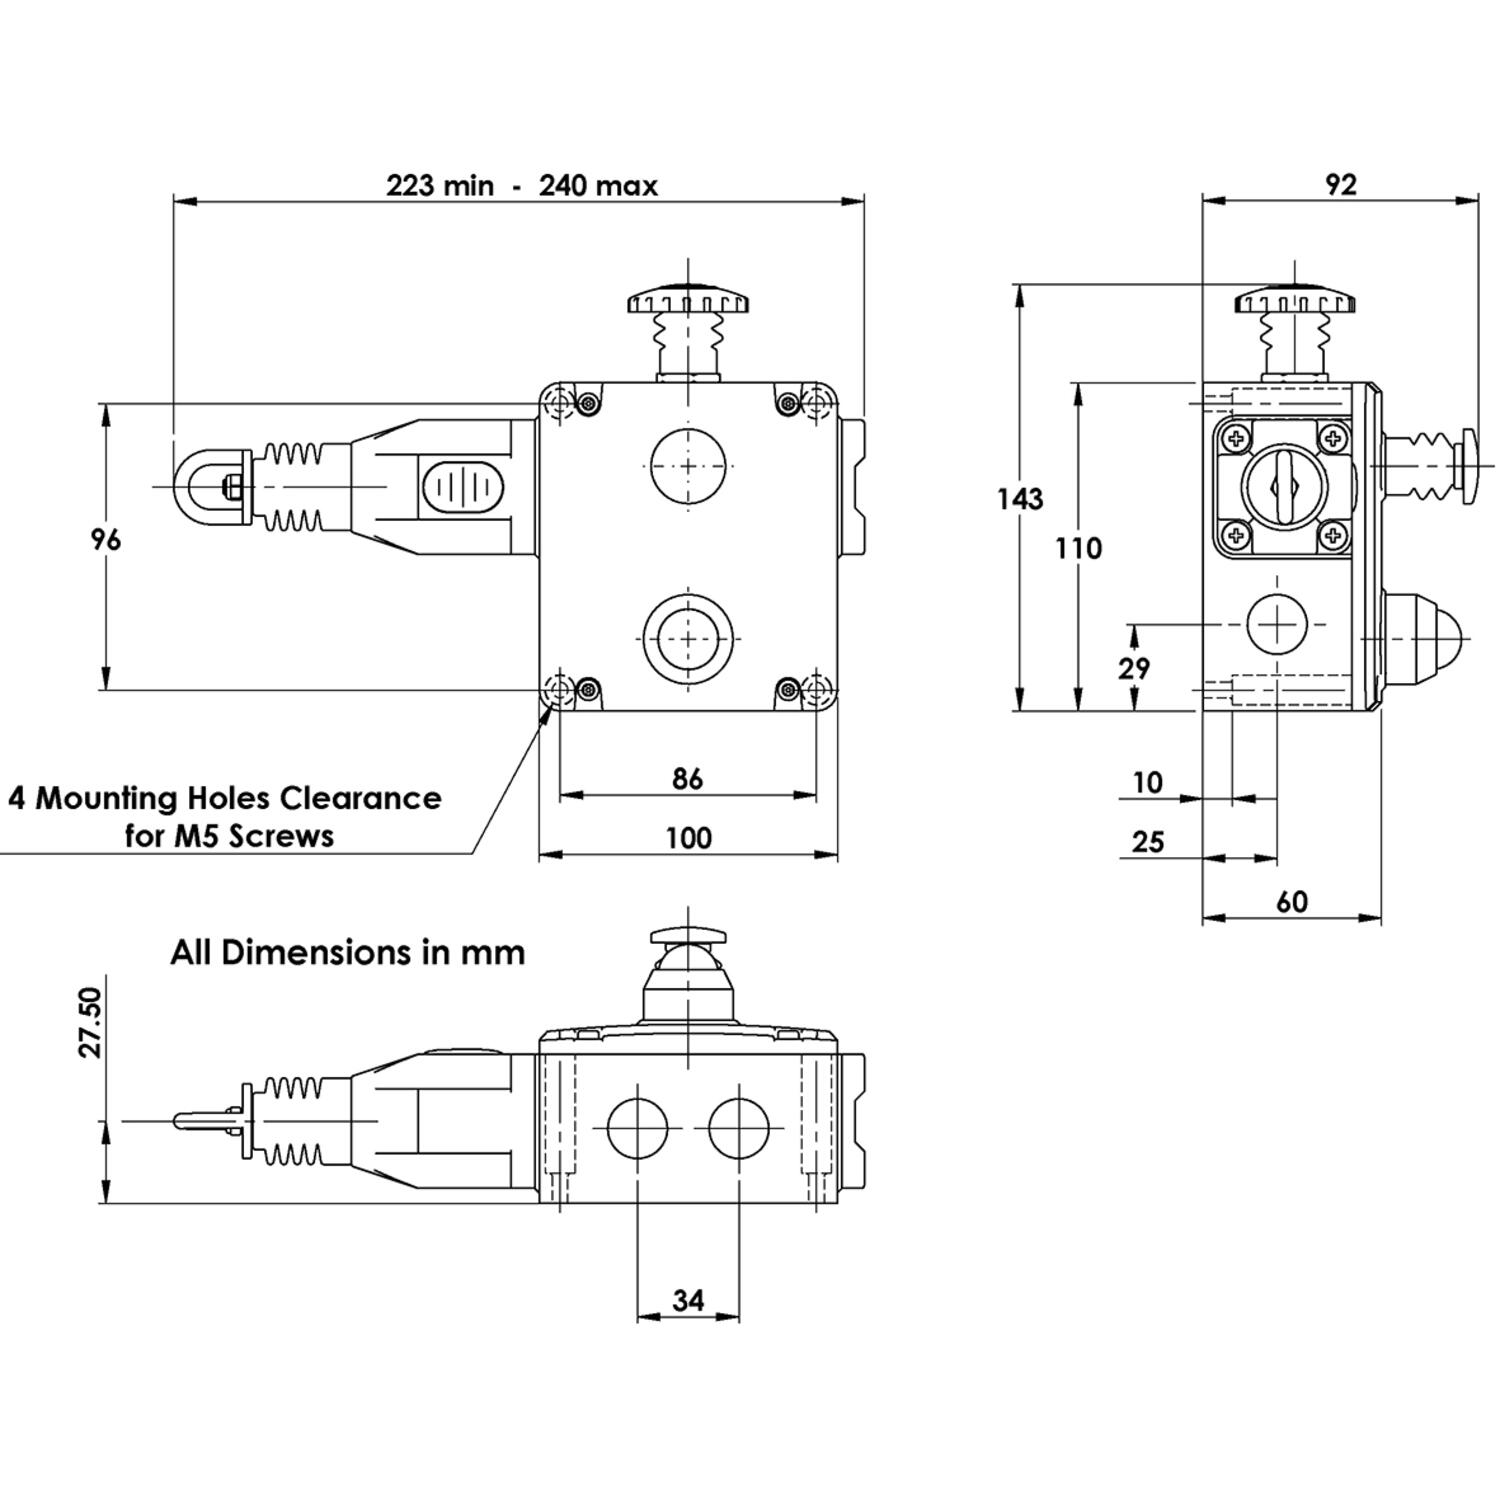
| Mounting | 4 x M5 |
| MTTFd | 214 years |
|---|---|
| Operating temperature | -25°C +80°C |
| PFHd | <1.0 x 10⁻⁷ |
| Rope span | 125m |
| Rope tension device | IDEM tensioner/gripper (quick fixing) |
| Rope type | 4.00mm outside diameter. Steel inner - PVC sheath |
| Short circuit overload protection | Fuse externally 10A(FF) |
| Tension force (typical mid setting) | 130 |
| Termination | Clamp up to 2.5mm² conductors |
| Thermal current (lth) | 10 |
| Typical operating force (rope pulled) | <125N <300mm deflection |
| Weight | 1030 |


Product description
The GLHL/R is a robust die-cast Heavy Duty Safety Rope Pull Switch designed to protect long conveyor lengths where protection is required up to 125m using two switches or up to 100m using a single switch. The die-cast housings are robust to survive indoor or outdoor use.
A bi-colour LED ensures switch status can be seen easily from a distance. They have 4NC 2NO contacts to ensure flexibility with all modern control applications and optional Explosion Proof contact blocks are available.
They can be used to complement the GLHD versions at each end of the rope span.
Add product as a new cart row
You already added this product. Choose whether to increase quantity on the existing row or add the product as a new row.

Precision in Motion: Kübler Linear Measurement Systems at Demesne Electrical
Precise, Durable Linear Measurement from Kübler
Browse our range of Kübler draw wire encoders and linear measurement systems, designed for accurate position and speed sensing in industrial and OEM applications. Built for tough environments. Trusted by automation professionals.

Welcome Jim Murray to OEM Demesne
A familiar face returns. Jim Murray joins OEM-Demesne as Chief Sales & Supplier Officer, bringing 26 years of industry leadership back to the business at a defining moment in the move to OEM Automatic.

Katko IsoSafe KSM Safety Switch
Katko has launched a significant upgrade to its IsoSafe KSM safety switch range (16–25A), built around the realities of modern installation work. The redesigned side-operated switch combines an
.png?as=1&iar=0&hash=32754F69BDE594727B35F2B8B9C1A3EC)
Wohner 60 Classic and Crossboard
Modular busbar systems that streamline power distribution, improve safety, and speed up panel builds.

Tekox Terminal Strips Safety Blocks and Porcelain Blocks
Great electrical installations don't fail because of the major components. They fail because of the small ones that didn't get enough attention.
It's easy to focus on the big-ticket items during specification — and let the terminal blocks become an afterthought. But inferior connection components have a habit of making themselves known over time. Loose connections, degraded insulation, premature failure. The kind of faults that are frustrating to trace and expensive to fix.
Tekox engineer their terminal strips, safety blocks, insulated strips, and porcelain blocks to the standards your installations deserve. Available now from Demesne Electrical — get in touch and we'll show you the range.

Conta-Clip Push-in PPVK Distribution Terminals
Conta-Clip PPVK push-in potential distribution terminals simplify control cabinet wiring with tool-free connections, compact DIN rail mounting, and reliable current distribution up to 41A.


